Salted Caramel Brownie Cake
This post may contain affiliate links. As an Amazon Associate and an affiliate for other programs, I earn a commission from qualifying purchases. Read the disclosure policy for more information.
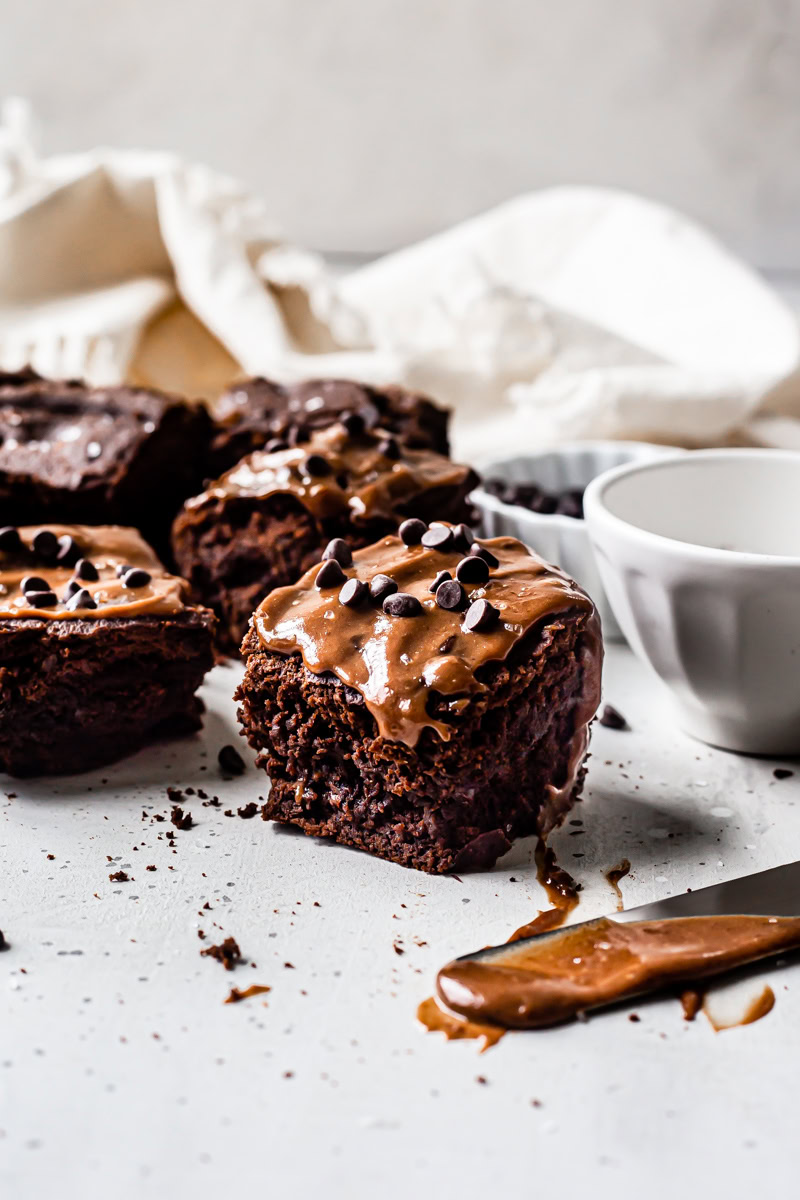
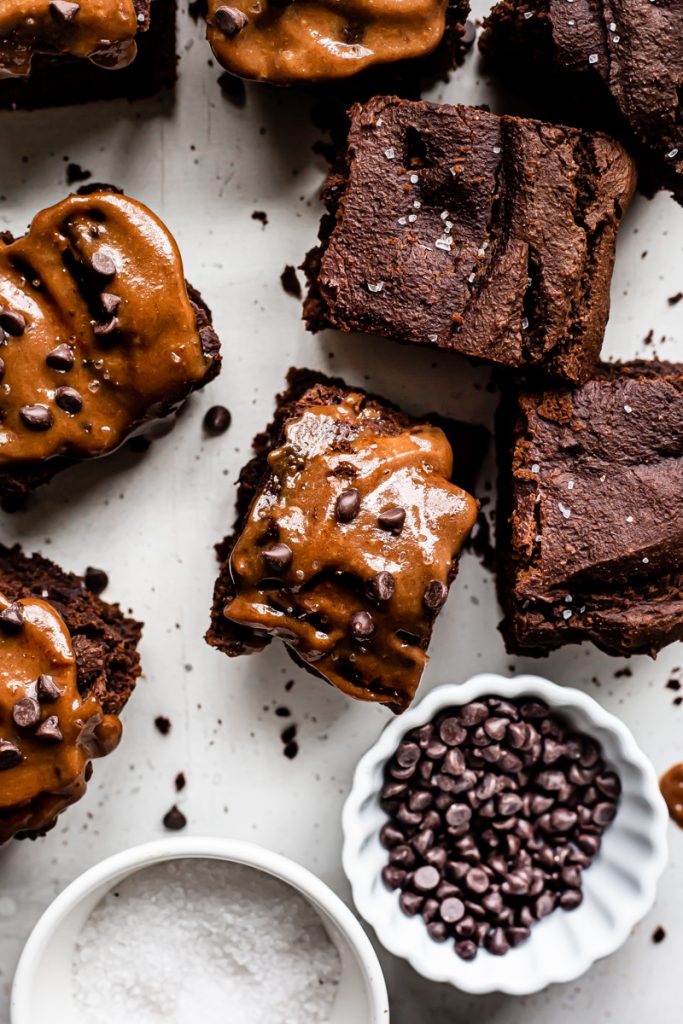
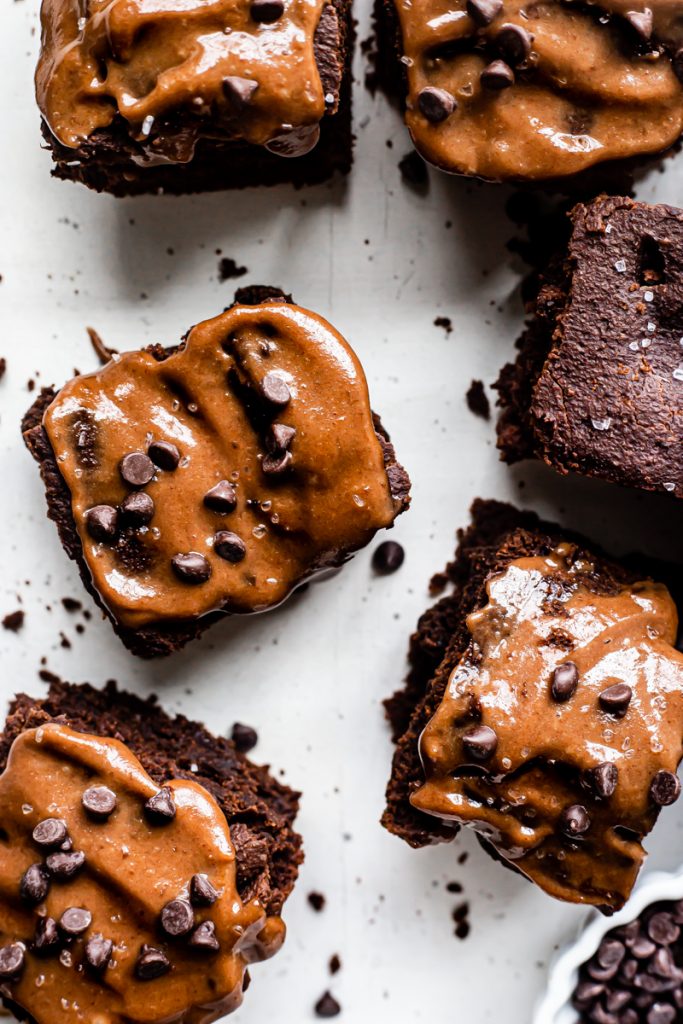
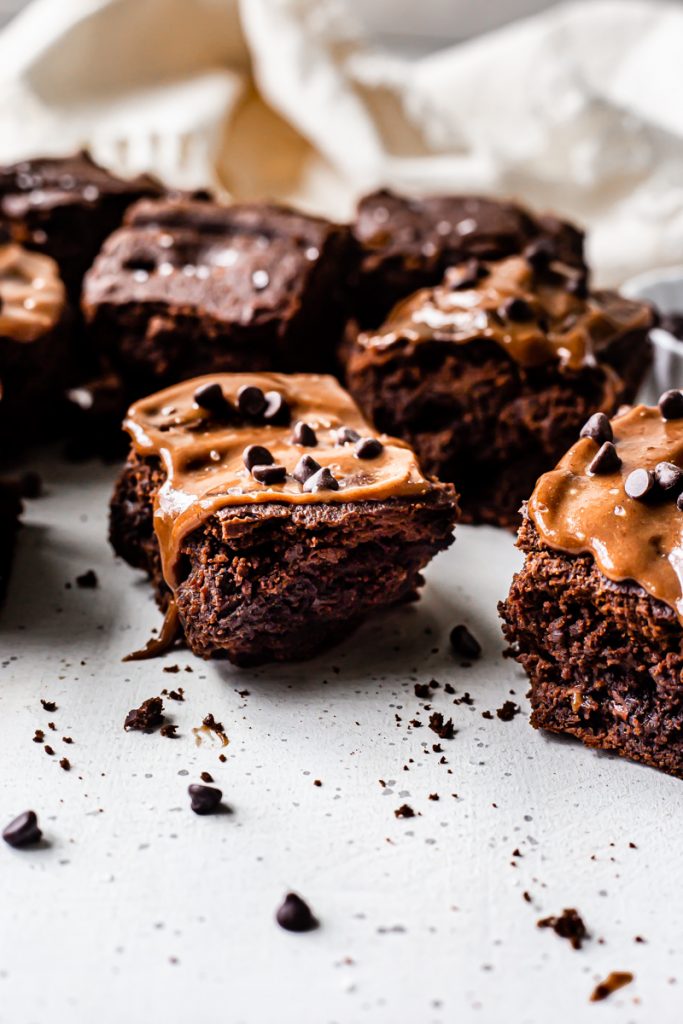
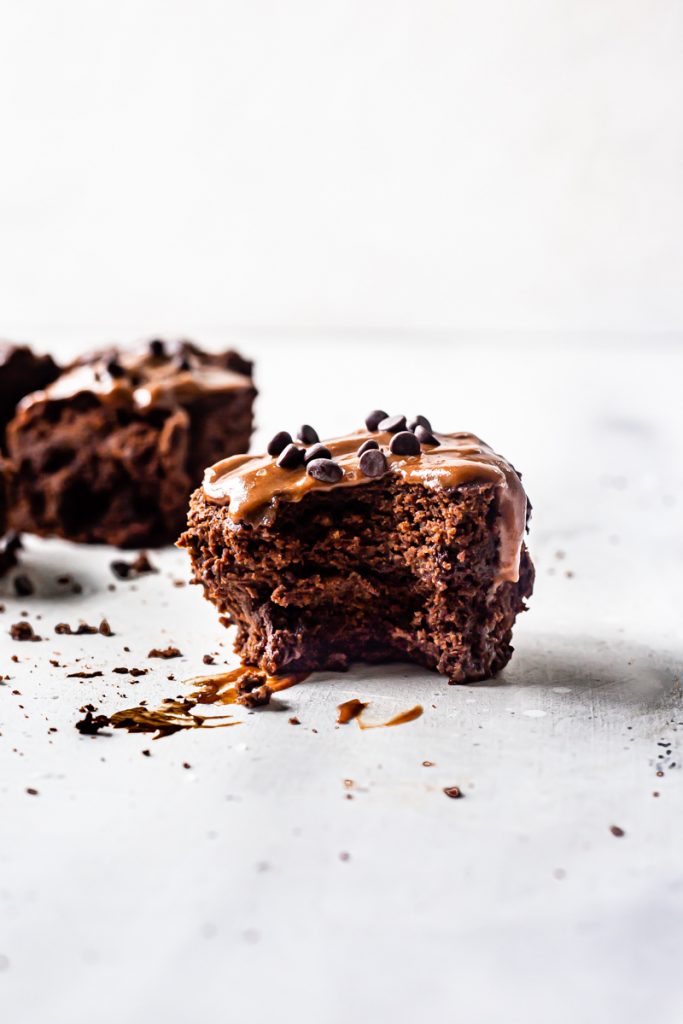
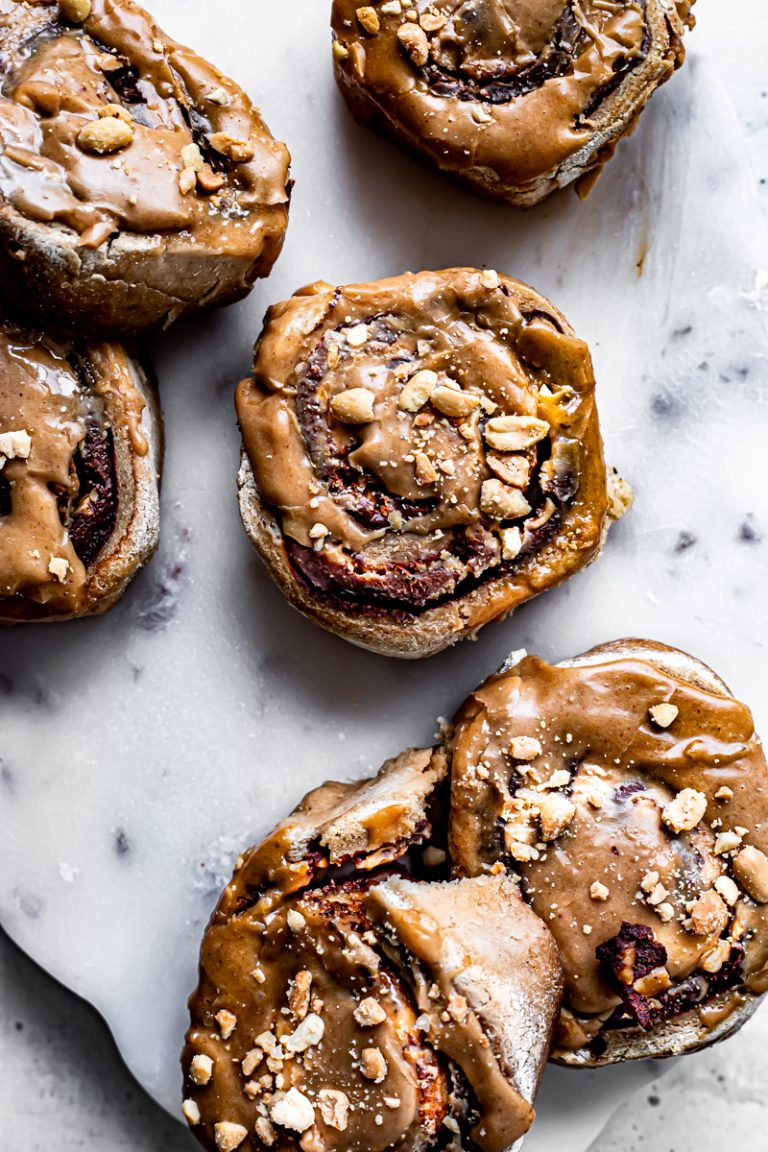
A decadent, rich, chocolate brownie cake recipe that is light and moist topped with a creamy, dairy-free salted cacao caramel and garnished with sea salt and chocolate chips for the best gluten-free, vegan, grain-free dessert!
I’ll be honest. I set out to create gluten-free, vegan, grain-free brownies. Kinda the story of my baking excursions… they either flop or they turn out great and I impress myself because gluten-free, vegan baking is hard y’all, and sometimes they give way to another recipe idea. In this case, my intention of making brownies flopped, BUT what I created instead blows my mind and I think has turned into the best brownie/cake recipe I have ever had, not just made. Had. They are unbelievably light and moist like cake, but have that rich, decadent brownie-esque goodness that I’m always craving.
This Salted Caramel Brownie Cake is perfect any time, but if you can’t decide on brownies or chocolate cake… this is your jam. Did I mention that it’s insanely easy to make too? Cuz when dat brownie craving hits, you ain’t got time to wait, I know.
Want To Remove Ads?
✓⃝ Enjoy every recipe on my site completely ad-free
✓⃝ Get instant access exclusive, member-only content
✓⃝ Receive a FREE bonus eCookbook + a weekly dinner meal plan + grocery shopping lists, and printable guides when you join (a $40+ value!)
✓⃝ Cancel anytime

To keep this Salted Caramel Brownie Cake gluten-free as well as grain-free, I’ve combined cassava flour with banana flour (my two new baking buddies) for the perfect flour combo. I also like to keep my baked goods as naturally sweetened as possible, so I used date sugar in mine, but feel free to use coconut sugar too. Let’s take a closer peek at what’s in this recipe, shall we?
☆ banana flour
☆ cassava flour
☆ date/coconut sugar
☆ unsweetened cacao powder
☆ baking powder + baking soda
☆ sea salt
☆ chocolate chips/chunks
☆ peanut butter (or other nut butter)
☆ coconut milk
☆ pure vanilla extract
☆ My Salted Cacao Caramel
The thing with gluten-free, vegan baking is you really need to make sure you either eat them all within two days before they dry out and/or get as hard as a rock. I mean, that’s no problem for my family and I really, haha, but the good news if you’re making them for yourself they do freeze well. First- no judgement if you do eat the whole brownie cake within a couple of days lol, but if you do freeze half the batch for later, just make sure to freeze them before you slather on the Salted Cacao Caramel and microwave them to enjoy right from the freezer!
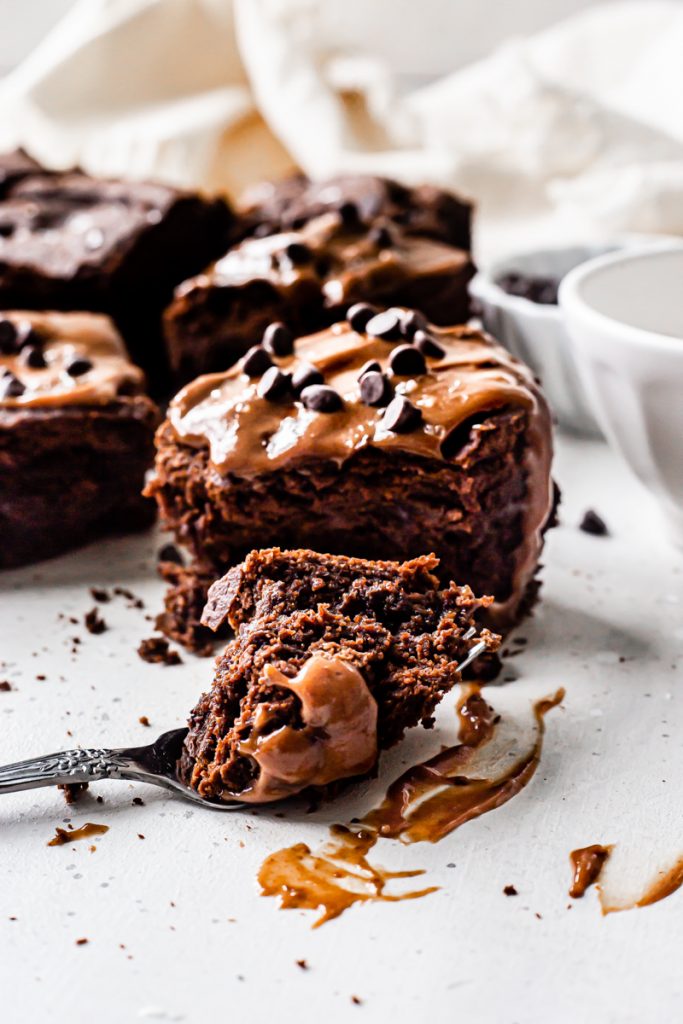
The Salted Cacao Caramel isn’t necessary, but I HIGHLY recommend it 🙂 You can find that recipe below also. If you like it even creamier, feel free to add more plant milk. This spreads amazing over so many things and keeps well in your fridge for up to 2 weeks also, so yay! And of course, garnish your brownie cake with more chocolate chips and sea salt for the perfect finishing touch! This Salted Caramel Brownie Cake is actually better warm, so feel free to let it cool just enough to slather on the caramel topping without melting it and then dig in!
I hope you all love this fantastically “failed” brownie baking creation wink wink, and if you make it, be sure comment below and tag me on Instagram or Facebook!
Print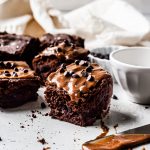
Salted Caramel Brownie Cake
- Total Time: 45 minutes
- Yield: 7–9 people 1x
Description
A decadent, rich, chocolate brownie cake recipe that is light and moist topped with a creamy, dairy-free salted cacao caramel and garnished with sea salt and chocolate chips for the best gluten-free, vegan, grain-free dessert!
Ingredients
- 1/2 cup cassava flour
- 3/4 cup banana flour
- 1/4 cup unsweetened cacao powder
- 1/2 cup date/coconut sugar
- 1 teaspoon baking powder
- 1 teaspoon baking soda
- pinch salt
- 1/4 cup peanut butter (or other creamy nut/seed butter)
- 1 can unsweetened coconut milk
- 1 teaspoon pure vanilla extract
- 1 cup dairy-free chocolate chips, for melting in the cake
Topping
- Salted Cacao Caramel (below)
- Chocolate chips
Salted Cacao Caramel
- 5 dates, pitted
- 1/4 cup coconut milk/other plant milk
- 1/4 cup unrefined coconut oil
- 2 tablespoons almond butter
- 2 tablespoons coconut butter
- 2 tablespoons maple syrup
- 3 tablespoons unsweetened cacao powder
- 1 teaspoon sea salt
Instructions
- Preheat your oven to 350 degrees.
- In a large bowl, whisk together all the dry ingredients.
- In a glass bowl/measuring cup, add 1/2 the chocolate chips/chunks, the peanut butter and pure vanilla extract and melt in the microwave for about a minute, stir and add back in in 10 second increments. **NOTE: you don’t want to burn your chocolate so be sure to stir it and see if it needs more melting. It’s ok if it’s not completely melted.
- Add the melted chocolate mixture to the dry ingredients along with the coconut milk. Stir to combine.
- Fold in the remaining half of the chocolate chips.
- Pour the batter into a sprayed or parchment-lined square baking dish and bake for 35 minutes, until the center isn’t wiggly.
- Let it cool while you make your salted cacao caramel topping: Place your pitted dates into a glass measuring cup/bowl and cover with water. Microwave for 2 minutes to soften them. Drain and place into a blender. In a small saucepan, melt the coconut oil over high heat. Once melted, whisk in the maple syrup. Whisk in the almond butter and continue to whisk until the mixture starts to bubble and thicken. Turn the heat down to low and whisk in the coconut butter, cacao powder and sea salt. Remove from heat and add the caramel to the blender with the dates and coconut milk and blend on high until smooth. Let it cool and thicken before spreading over your cake.
**NOTE: you can add more coconut milk if it’s too thick - Spread your Salted Cacao Caramel over top and garnish with more chocolate chips if desired.
- Enjoy within 2 days. Do not refrigerate. You may freeze it and save some for a later time!
- Prep Time: 10 minutes
- Cook Time: 35 minutes
- Category: Dessert
- Cuisine: American


Hello,
Is it possible to make it with normal flour instead of banana one ? Hard to find it in France and pretty expensive too so I wanted to know before making it.
Hi there! So sorry I just saw your comment. You could try regular flour, however regular flour is more dense than banana flour so if you have a very light flour I would go with that one. I have not tried to make this recipe with another flour so I cannot guarantee the recipe will turn out the same. Hope this helps!
It looks awesome. Thank you for sharing this recipe.
Thank you!!! ☺❤
just made it and it was (and still is) delicious! I just don’t know at what moment you put the coconut milk in the caramel..? I boiled it together with the coconut oil at the beginning, but my caramel – even though still super tasty – looks much darker and is super super thick. Don’t know what happened there 🙂
Hi Johanna! So sorry that wasn’t clear in my directions 🙁 thank you for pointing that out. You add the coconut milk in at the end until you achieve the desired consistency you’d like. I’m so glad overall, you liked it!
haha ok for next time then 😉 And obviously there will be a next time! Why should we not refrigerate it? Love your blog and all those amazing recipes, just discovered it and am already on my thrid recipe 😉 All amazing, and so different – never used casava or banana flour before in my life! Thank you!
So glad to hear it! And I’m so glad you’re enjoying my recipes ☺️??? it’s best not to refrigerate because coconut oil gets very hard when cold so it’ll make it hard. I’m a big fan of cassava and banana flour and actually just started using them both myself last year! I like them because they are plant based, gluten free and grain free! Thank you for you kind comments and feedback!
Aw that’s so great to hear that you’re enjoying my recipes! ☺️ I’m so so glad… and happy to introduce you to new (healthy!) food products! Also if you refrigerate the cake it’ll become pretty hard, you can pop it in the microwave for a few seconds but then the topping melts… so it’s best just left out covered on the counter for a couple of days. 🧡