Or
My new cookbook is here!
Order now
Gluten-Free, Vegan & Plant-Based Recipes
HEALTHY LITTLE VITTLES EVERYDAY
Gluten-Free, Vegan & Plant-Based Recipes
Healthy Little Vittles Everyday
My new cookbook is here!
ORDER NOW
Gina Fontana is a certified health coach, recipe developer, food photographer, published author, and blogger. Her own personal health challenges led her to a gluten-free, vegan, plant-based lifestyle where she found significant improvement in her symptoms. Her passion and mission is to now share that with others who also need (or want) to pursue a healthier lifestyle.
By subscribing to the Healthy Little Vittles email list, you agree to receive updates, recipes, affiliate products I love, and stay in the know about other fun stuff going on at Healthy Little Vittles, right to your inbox!
Enter your email and I'll send the free ebook right over!
learn more
learn more
Healthy Little Vittles eBook
My Books
My Favorite Skincare Line
Read our privacy policy for how we collect and use your information.
About the author
Gina Fontana
“Snickers” Frozen Yogurt Chocolate Covered Date Bites
May 21, 2023
Last Updated on April 2, 2024
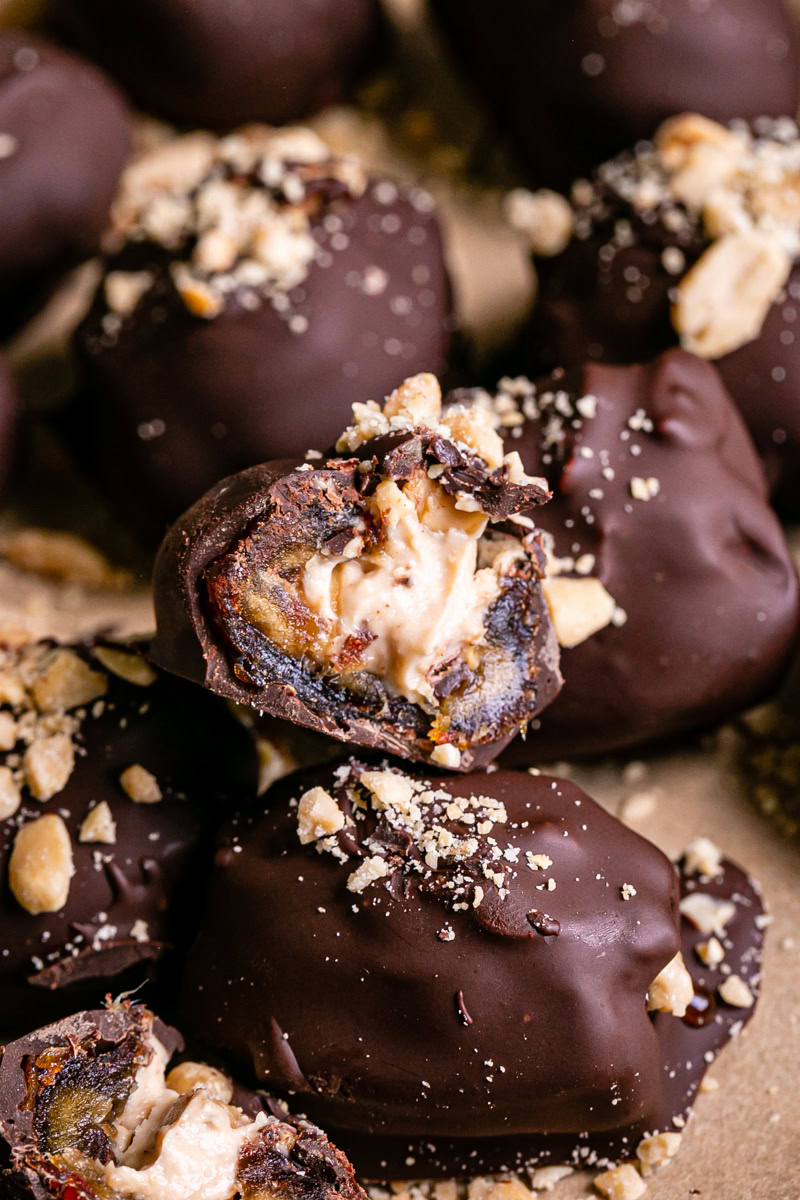
Looking for a sweet treat to cool down this summer? Look no further than these “Snickers” Frozen Yogurt Chocolate Covered Date Bites! They’re easy to make and will satisfy all your chocolate candy cravings. 🍫

When you’re craving something sweet but don’t want to heat up the oven or spend a lot of time making a dessert, these bites are the perfect solution! These “Snickers” Frozen Yogurt Chocolate Covered Date Bites are the perfect indulgence for those hot summer days. They’re remind me of Snickers ice cream bars, but in bite form and much healthier!
You’ll stuff dates with a peanut butter yogurt mixture that resembles the nougat in a snickers bar, then top with peanuts. The dates offer that caramel flavor, and of course we’re dunking them in chocolate! Add more crushed peanuts on top and OMG… I dare you to just eat one! 😉

The Snickers nougat-like filling is made with dairy-free yogurt, I used coconut yogurt, and unsweetened peanut butter. To make the mixture more smooth and creamy, heat the peanut butter in the microwave for 20-30 seconds before whisking into the yogurt.

Start by removing the pits from your large, whole dates. You can buy them already pitted, but I find they are much fresher with the pits. remove the date pits by slicing a shallow line vertically down one side of the date, gently open the date and remove the pit.

Fill each date with the peanut butter yogurt and then top with peanuts! Place each filled date on a parchment-lined baking sheet. Once they are all stuffed, freeze for about 30 minutes.
Melt dairy-free dark chocolate chips in the microwave in 30 second increments, stirring in between, until fully melted and smooth. Fully submerge each date in the melted chocolate and cover it completely. I used a fork to do this. Place back onto the baking sheet and sprinkle the top with crushed peanuts. Place back into the freezer for 15-20 minutes to harden and enjoy! Keep them stored in the freezer and allow them to soften slightly before enjoying.

If you’re a fan of frozen yogurt, chocolate, and dates, then you’ll love these “Snickers” Frozen Yogurt Chocolate Covered Date Bites! They’re a delicious and refreshing way to satisfy your sweet tooth.

Let me know what you think down below in the comments section, as well as giving it a five star rating ⭐️⭐️⭐️⭐️⭐️ so that others can discover this delicious gnocchi recipe! Tag me on Instagram, Facebook, or Pinterest if you make them!
Also check out my Snickers Cinnamon Rolls or my Cookie Dough Stuffed Dates!


"Snickers" Frozen Yogurt Chocolate Covered Date Bites
Looking for a sweet treat to cool down this summer? Look no further than these "Snickers" Frozen Yogurt Chocolate Covered Date Bites! They're easy to make and will satisfy all your chocolate candy cravings. 🍫
Ingredients
- 1 cup dairy-free yogurt (I used coconut yogurt)
- ½ cup unsweetened peanut butter
- 25-30 large dates
- Peanuts, some whole and some crushed
- 12 ounces dark chocolate chips
Instructions
Line a baking sheet with parchment paper. Remove the pits from the dates. Melt the peanut butter for 20-30 seconds in the microwave and add to a bowl with the dairy-free yogurt. Whisk until smooth and creamy.
Spoon the peanut butter yogurt into the dates, add a few peanuts to each and freeze about 30 minutes.
Melt the chocolate chips in 30 second increments, stirring in between, until fully melted. Gently roll each date in the chocolate until fully covered, I used a fork. Let the excess chocolate drip off the date and then place back onto the parchment lined baking sheet. After you place each date back onto the baking sheet, sprinkle the tops with crushed peanuts and place back in the freezer until hardened, 15-20 minutes.
Keep them stored in the freezer.
Notes
*Allow them to soften slightly after removing from the freezer before enjoying- about 5 minutes.

This post may contain affiliate links. As an Amazon Associate and an affiliate for other programs, I earn a commission from qualifying purchases. Read the disclosure policy for more information.
share this post
The Healthy Little Vittles blog provides general information and discussions about health, health foods, nutritional content and value, and related subjects from time to time. Read the health disclaimer for more information.
You MIGHT Also like
Leave a Reply Cancel reply
This site uses Akismet to reduce spam. Learn how your comment data is processed.
About the author
Gina Fontana
Gina Fontana is a certified health coach, recipe developer, food photographer, published author, and blogger. Her own personal health challenges led her to a gluten-free, vegan, plant-based lifestyle where she found significant improvement in her symptoms. Her passion and mission is to now share that with others who also need (or want) to pursue a healthier lifestyle.
COOKIE POLICY
Privacy POLICY
Categories:
Menu:
Get a FREE 25-recipe eBook of my most popular recipes!
Read our privacy policy for how we collect and use your information.
By subscribing to the Healthy Little Vittles email list, you agree to receive updates, recipes, affiliate products, and stay in the know about other fun stuff going on at Healthy Little Vittles, right to your inbox! Enter your email and I'll send the free ebook right over!
"So, whether you eat or drink, or whatever you do, do all to the glory of God".
- 1 Corinthians 10:31
